Klaviyo is a powerful email marketing platform designed to help businesses engage with their audience effectively. One of the key features of Klaviyo is its ability to create custom email templates, which can significantly enhance your email marketing campaigns. In this guide, we’ll walk you through the process of creating email templates in Klaviyo, ensuring your emails are both visually appealing and highly effective.
Getting Started with Klaviyo
Setting up Your Klaviyo Account
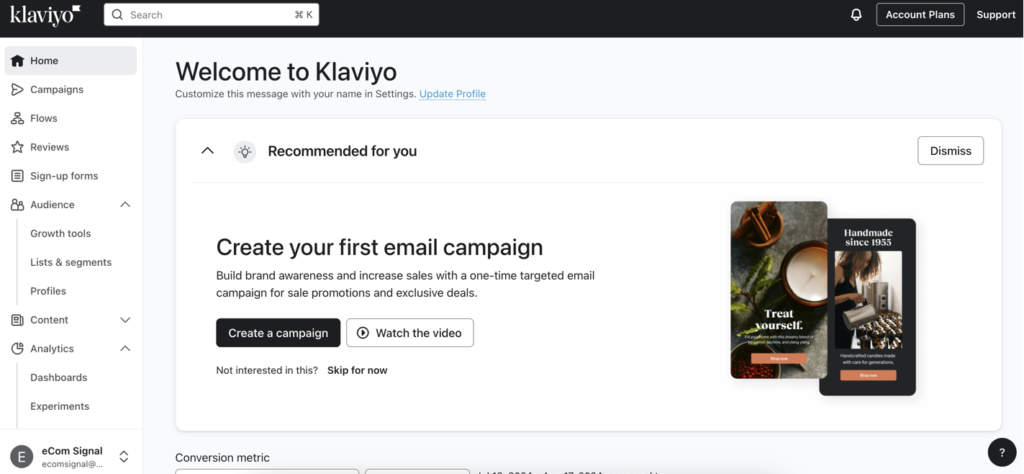
Before you can create email templates, you’ll need a Klaviyo account. If you haven’t already, sign up for an account on the Klaviyo website. Once your account is set up, log in and familiarize yourself with the dashboard.

Navigating the Klaviyo Dashboard
The Klaviyo dashboard is your command center. From here, you can manage your email campaigns, audience segments, and email templates. Take a moment to explore the different sections, such as Campaigns, Flows, Lists & Segments, and Templates.
Creating a New Email Template
Accessing the Email Template Section
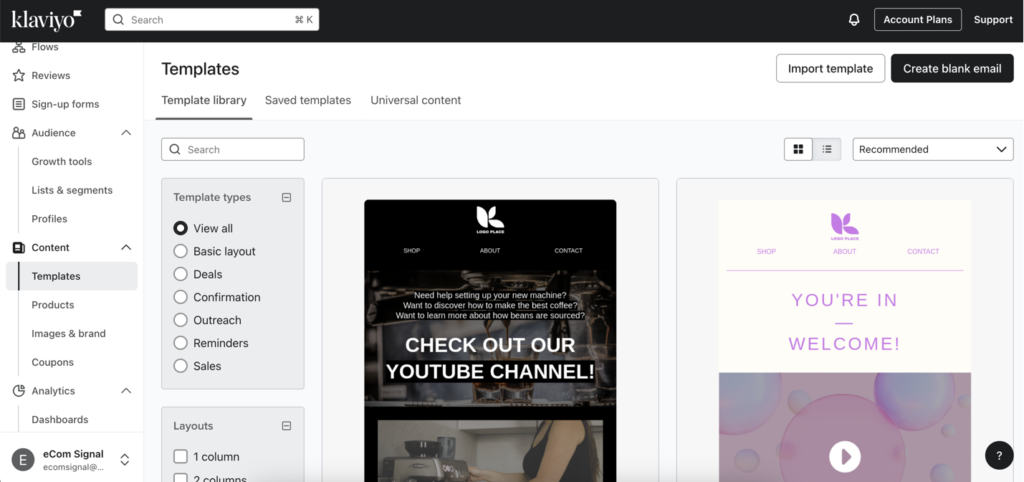
To create a new email template, go to the Templates section from the main dashboard. Click on “Create Template” to get started. This will open up the template editor where you can choose the format and design your email.

Choosing a Template Format
Klaviyo offers several template formats:
- Basic Templates: Start from scratch with a blank canvas, giving you complete control over every element.
- Custom Templates: Import your own HTML template if you have a specific design already created outside of Klaviyo.
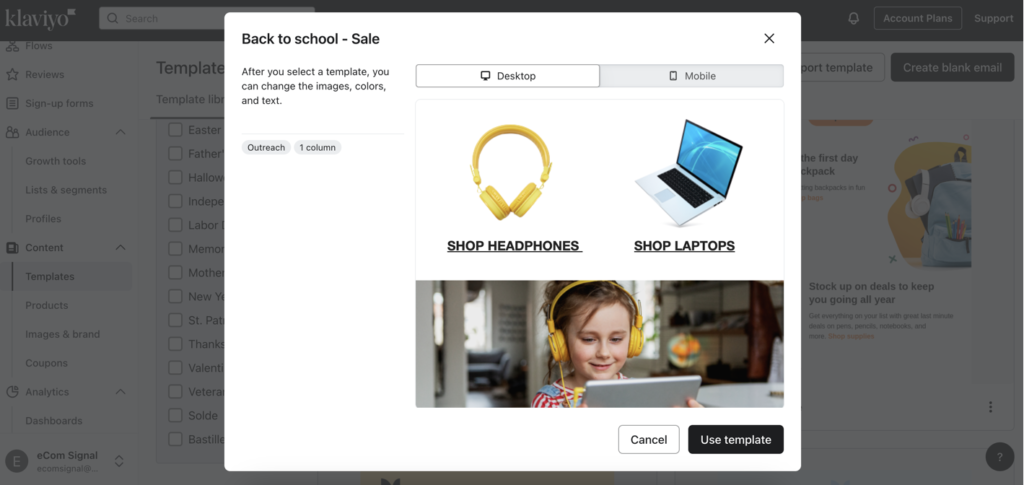
- Pre-built Templates: Use professionally designed templates provided by Klaviyo, which can be customized to suit your needs.
For beginners, starting with a pre-built template is often the easiest option. Select a template that closely matches your desired layout and style to save time on design.
Designing Your Email Template
Adding and Customizing Elements
Klaviyo’s drag-and-drop editor makes it easy to add and customize elements in your email template. You can include the following components:
- Text Blocks: Add headings, paragraphs, and other text elements. Customize the font, size, color, and alignment to match your brand’s style.
- Images: Upload and place images to enhance visual appeal. Use high-quality images and optimize their size to ensure quick loading times.
- Buttons: Create call-to-action buttons to drive conversions. Customize the color, size, and text to make them stand out.
- Social Links: Include links to your social media profiles to encourage followers and engagement.

Using Klaviyo’s Drag-and-Drop Editor
The drag-and-drop editor allows you to easily rearrange elements within your template. Simply click and drag elements to your desired location. You can also customize the appearance of each element using the settings panel on the right side of the editor. This panel allows you to adjust padding, margins, background colors, and more.
Best Practices for Mobile-Friendly Designs
Ensure your email templates are mobile-friendly by following these best practices:
- Use a Single-Column Layout: Single-column layouts are easier to read on mobile devices.
- Larger Fonts: Use larger fonts to improve readability on smaller screens.
- Touch-Friendly Buttons: Ensure buttons are large enough to be easily tapped with a finger.
- Responsive Images: Use images that scale appropriately on different screen sizes.
Personalizing Your Email Template
Utilizing Dynamic Content
Dynamic content allows you to tailor your emails based on recipient data. This means you can show different content to users based on factors such as their location, purchase history, or browsing behavior. To use dynamic content in Klaviyo:
- Insert Dynamic Blocks: Drag dynamic content blocks into your template.
- Set Display Conditions: Define conditions for when certain content should be shown. For example, you can display a special offer only to users who have previously made a purchase.
Adding Personalization Tokens
Personalization tokens automatically insert recipient-specific information into your emails. This makes your emails feel more personalized and relevant. Common personalization tokens include:
- First Name: Address recipients by their first name (e.g., “Hi {first_name},”).
- Last Purchase: Reference a recipient’s last purchase (e.g., “We hope you loved your {last_product_purchased}.”).
To add personalization tokens in Klaviyo:
- Click where you want to insert the token.
- Select “Insert Property” from the text editor.
- Choose the property you want to include, such as “First Name” or “Last Purchase.”
Segment-Specific Customization
Tailor your templates for different audience segments to increase engagement. For example:
- New Subscribers: Create a welcome email with a special offer for new subscribers.
- Loyal Customers: Send exclusive deals to your most loyal customers.
- Inactive Users: Craft re-engagement emails to win back inactive users.
Use Klaviyo’s segmentation tools to define and target these specific groups within your email campaigns.
Testing and Previewing Your Email Template
Using the Preview Feature
Before sending your email, use Klaviyo’s preview feature to see how it will look in recipients’ inboxes. This helps you catch any design issues or typos. To preview your email:
- Click the “Preview” button at the top right of the editor.
- Choose to preview your email on desktop and mobile.
- Review the content and layout for any necessary adjustments.
Sending Test Emails
Sending test emails to yourself and your team is crucial to ensure everything looks and works as expected. Follow these steps:
- Click the “Send Test Email” button in the editor.
- Enter the email addresses of the recipients for the test.
- Send the email and review it in different email clients (e.g., Gmail, Outlook).
Check for:
- Correct display of images and text.
- Functional links and buttons.
- Proper use of personalization tokens.
Checking for Responsiveness
Ensure your email is responsive by viewing your test emails on different devices (desktop, tablet, mobile). This step is essential to confirm that your email looks great and functions correctly across all screen sizes.
Saving and Reusing Email Templates
Saving Templates for Future Use
Once you’re satisfied with your email template, you can save it for future use. This saves time and ensures consistency across your email campaigns. To save a template in Klaviyo:
- Click on the “Save Template” button at the top of the editor.
- Give your template a descriptive name that reflects its purpose or content.
- Confirm the save action.
Managing and Organizing Saved Templates
Keeping your templates organized helps you quickly find and reuse them. Here are some tips for managing your saved templates in Klaviyo:
- Use Descriptive Names: Name your templates clearly, such as “Welcome Email Template” or “Holiday Sale Template.”
- Create Folders: Organize templates into folders based on their purpose or campaign type. For example, create separate folders for “Promotional Emails,” “Transactional Emails,” and “Newsletter Templates.”
- Regularly Update Templates: Periodically review and update your templates to ensure they remain effective and aligned with your current branding and marketing goals.
Conclusion
Creating email templates in Klaviyo is a straightforward process that can greatly enhance your email marketing efforts. By following this step-by-step guide, you’ll be able to design, personalize, and test effective email templates that engage your audience and drive results. Don’t hesitate to experiment with different designs and content to see what works best for your brand.


