Setting up Klaviyo pop-ups is an effective way to capture email addresses and engage with your website visitors. Here’s a step-by-step guide on how to set up Klaviyo pop-ups:
Step 1: Log in to Klaviyo
- Log in to your Klaviyo account.
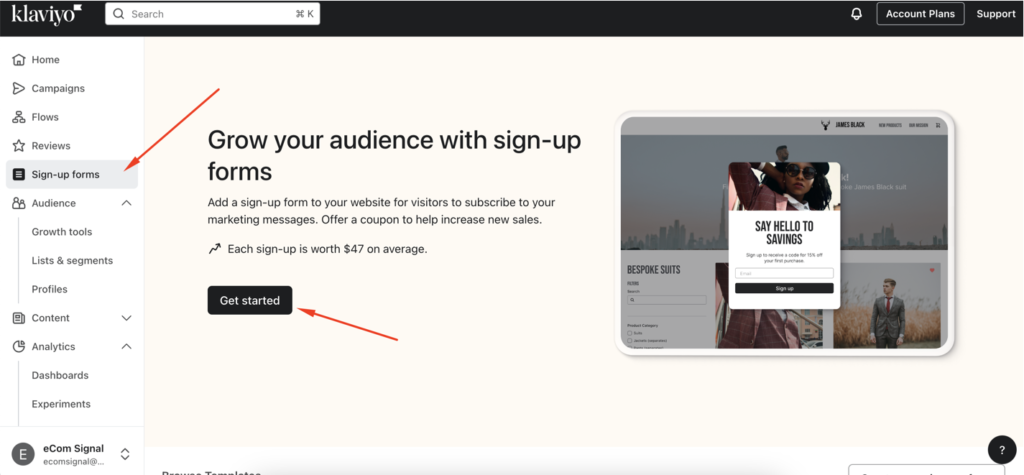
Step 2: Navigate to the Signup Forms Section
- Click on the “Signup Forms” tab from the left-hand menu.

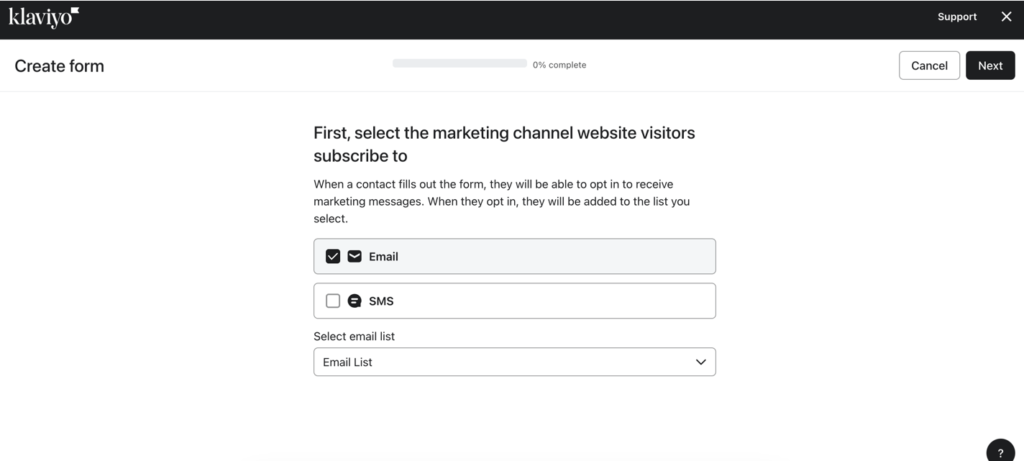
Step 3: Create a New Signup Form
- Click on the “Create Signup Form” button.
- Select “Pop-Up” from the list of form types.

Step 4: Choose a Template
- Select a pre-designed template that suits your needs, or start with a blank template to create a custom design.
Step 5: Customize Your Pop-Up
- Design your pop-up using Klaviyo’s form builder. You can customize various elements such as:
- Text: Add and edit the text to match your branding and message.
- Images: Add images or logos to make your pop-up visually appealing.
- Fields: Add fields like email, name, phone number, etc., that you want to collect from your visitors.
- Buttons: Customize the call-to-action button text and style.
- Adjust the layout and style to match your website’s look and feel.
Step 6: Set Up Targeting and Behavior
- Targeting: Define who should see the pop-up. You can target all visitors, new visitors, returning visitors, or visitors from specific sources.
- Behavior: Set up the behavior triggers for the pop-up, such as:
- Time Delay: Show the pop-up after a certain amount of time on the page.
- Scroll Percentage: Show the pop-up after the visitor scrolls a certain percentage of the page.
- Exit Intent: Show the pop-up when the visitor is about to leave the page.
Step 7: Configure Submission Actions
- After Submission: Decide what happens after a visitor submits the form. Common actions include:
- Show a Success Message: Display a thank you message or confirmation.
- Redirect to URL: Redirect the visitor to a specific page after submission.
- Add the new contacts to a specific list or segment in Klaviyo.
Step 8: Review and Publish Your Pop-Up
- Review all the settings and design elements to ensure everything is set up correctly.
- Click on the “Publish Form” button to make your pop-up live on your website.
Step 9: Install the Klaviyo Embed Code (if not already installed)
- Go to the “Signup Forms” tab and select “Manage Installations.”
- Copy the provided embed code.
- Paste the embed code into the header of your website’s HTML, or use your website’s theme settings to add the code to the header.
Step 10: Monitor and Optimize
- Monitor the performance of your pop-ups through Klaviyo’s analytics.
- Optimize your pop-ups based on performance data. Make adjustments to the design, targeting, and behavior settings to improve conversion rates.
Tips for Effective Pop-Ups
- Keep it simple: Make sure the form is easy to understand and quick to fill out.
- Offer incentives: Provide a discount, free resource, or other incentives to encourage sign-ups.
- Test different variations: A/B test different designs, messages, and triggers to find what works best for your audience.
- Ensure mobile-friendliness: Make sure your pop-up is responsive and looks good on all devices.
By following these steps, you can set up effective Klaviyo pop-ups to capture leads and engage with your website visitors. If you have any specific questions or need further assistance, feel free to ask!


